Showing posts with label Bedroom Makeover. Show all posts

Wednesday, December 7, 2016

Simple Solutions for an Instant Style Boost

I'm beaming with pride. Nothing makes a designer happier than having a client take your advice. Not long ago I met with a client whose home had been for sale during a hot market, but had received very little attention from buyers. The house was newer, well-kept, and in a great location. So its failure to receive an offer was perplexing to her and the agent. After visiting the home, it didn't take long to identify three big issues that were making it hard for buyers to love the home.

1. Paint. Several rooms were painted in very saturated and muddy earth tones. With the current trend being light palettes and greige tones, this home seemed out of style.

2. Haphazard Design. Low lighting, disorganized & visible electrical cords, and a lack of balance in major rooms gave the home a sloppy appearance.

3. Mediocre Master. The master suite is one of the most important rooms in a home to buyers. Underwhelming details in this master suite left potential buyers disappointed and wanting to look elsewhere.

To remedy these problems, the homeowner was advised to: Paint, fix issues of bad scale, improve lighting, remove clutter, and boost elements of style -- especially in the master.

Take a look at the Before & After photos . . .

Living BEFORE
Before -- The room was a muddy, greenish-brown hue. Feedback on the color selection from potential buyers was not positive. The heavy color, particularly on the coffered ceiling, made the room feel heavy and drab. Compounding the issue were furnishings lining the perimeter of the space, making the room seem very short.


Living AFTER
After -- The room is lighter and brighter. The new paint color on the coffered ceiling helped to visually raise the height and virtual space of the room. 


Living BEFORE
Before -- The small TV on the mantle, again, made the room seem visually short. The scale was just not good. Plus, cords hanging from the mantle along with the cable box perched on a stand made for a very untidy and chaotic appearance. As a result the clutter and disorganization cheapened marble finishes and architectural elements. 


Living AFTER
After -- The large art and accessories help to give the room a polished, coordinated look in keeping with the home's grand architectural features. 


Dining BEFORE
Before -- The dining room's muddy color and lack of personality failed to impress.


Dining AFTER
After -- The dining room's lighter color, well-proportioned art, tasteful centerpiece, and oriental rug soften the room and add touches of simple charm.


Master BEFORE
Before -- The master suite was drab and sloppy. It was just not the stylish retreat that today's buyers desire.


Master AFTER
After -- Bedside tables, large matching lamps, coordinated bedding, and a large architectural art piece as a headboard added instant style and luxury that this suite lacked.

It turned out really amazing and is sure to wow buyers!

If your home is sitting on the market with little interest OR if you love your home, but are just tired of your current look -- it may be time to think about making some quick, easy, and inexpensive changes. Paint, updating fixtures, coordinating bedding, and improving lighting are the easiest and most economical ways to give your home an impressive, coordinated, and polished look.


Friday, November 29, 2013

Trees, Turkeys, & Twin-size Sheets

Yesterday we hosted the whole family for Thanksgiving dinner. As most anyone who has ever hosted the meal of the year will tell you, there's a ton of prep work required before the first dish hits the table. Chief among the list of to-do's is cleaning. I keep my home fairly clean every day. But when it comes to special occasions, I always want to make things sparkle.

So before we fried three turkeys, baked two dishes of cornbread dressing, and one giant pan of homemade mac & cheese to go with all the other fixings, my husband and I cleaned the house from top to bottom. Steaming carpets, wiping baseboards, washing windows; we had enough stuff on our list to keep us busy for five full days. Despite our long list of chores, with less than 24 hours to Turkey Time, I decided to give our bedroom a mini-makeover.

I'm really terrible about remembering to take "Before" pictures of my own stuff. I always remember when we work with clients, but when it comes to my own projects I regularly drop the ball. Such is the case with my latest project. I had to wade through some really old photos to give you an idea what things looked like before we made changes on Wednesday.

Biggest Bradford pear trees ever!
The first "Before" picture shows the real impetus for this project. You see those giant Bradford pear trees? I had a hate-love relationship with those trees for many years. I hated the way they blocked the view of our home. And I hated the way that no matter how often we pruned them, whenever the slightest wind blew, a branch would usually fall off. Eventually strong winds relieved us of the hassle of regular prunings by taking them both completely down. That's when I discovered that I actually loved those trees because whenever the moon was full, they kept the piercing 3 AM moonlight from shining right into my eyes.

So let's take a look at my bedroom -- or at least what my bedroom looked like a few years ago.

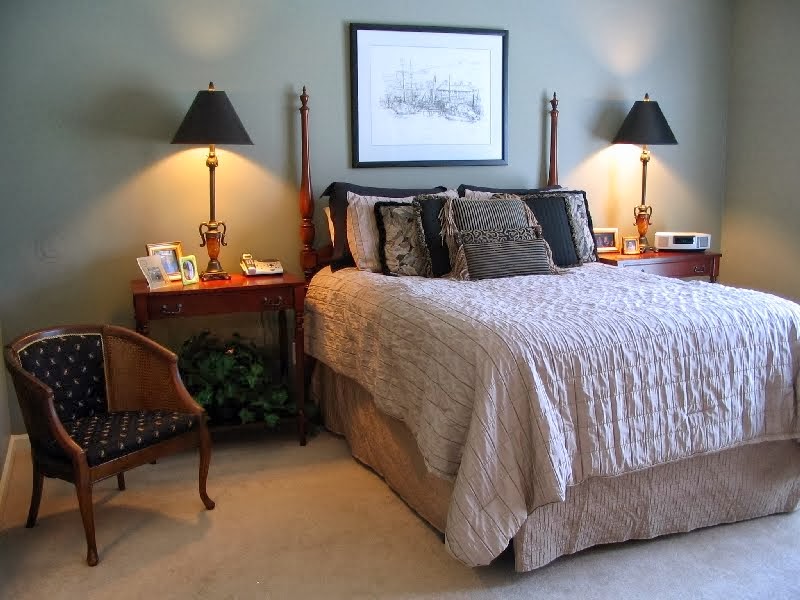
BEFORE - celery green walls, ornate bedding, sad little chair.
A year or so after the previous picture was made, we upgraded to a king-sized bed which required a new headboard, bedding, etc. I showed a glimpse of the new bed when I discussed how to properly make a bed. Here's how it looked just a few days ago . . .

King size bed w/dark frame & microfiber upholstered headboard
Now to the "AFTER" photos . . . Before you take a look, I need to reiterate that this is a mini-makeover. There is still plenty of changes to come like new lamps, art, and more. For now though, here's a look at phase one -- all accomplished on the Wednesday night before Thanksgiving.

Bedroom AFTER (Phase I)
First, we got rid of those celery green walls (Okay, I didn't do this step on Wednesday. That was done a few months ago). Next we painted, glazed, and distressed the headboard. Then we reupholstered it with a simple grey on white plaid fabric.

After upholstering the headboard, I had a little bit of fabric left. In fact, it was just enough to cover that sad little bedside chair. Looks a lot better now, huh?

Then the obvious change of adding simple, white bedding. So simple, but so impactful.

Then we attacked the primary problem of my bedroom -- covering that arched window that lets the full moon blind us on a monthly basis. Our ceilings are pretty tall (10 ft), so we needed extra long curtains. With the crown molding, we needed 110" panels to be exact. The problem though is that with less than 24 hours, finding ready-made 110" panels is next to impossible. So we opted for a pair of XL Twin-size flat bed sheets hung from cafe clips. And when the moon is full, you can bet we'll slide those bad boys across that arch and sleep like babies for the first time since the trees fell.


I'm really thankful that Grady approves of the changes. Nothing is worse than a grumpy schnauzer during the holidays!